Before I dive into this new step-by-step article, let me point out that there are A LOT of similarities between the way how I painted up Harold and how I painted up Roy. So feel free to take a look at the step-by-step for Roy as well, as I might be going into more details for some parts that I am not covering as much in-depth in this article here.
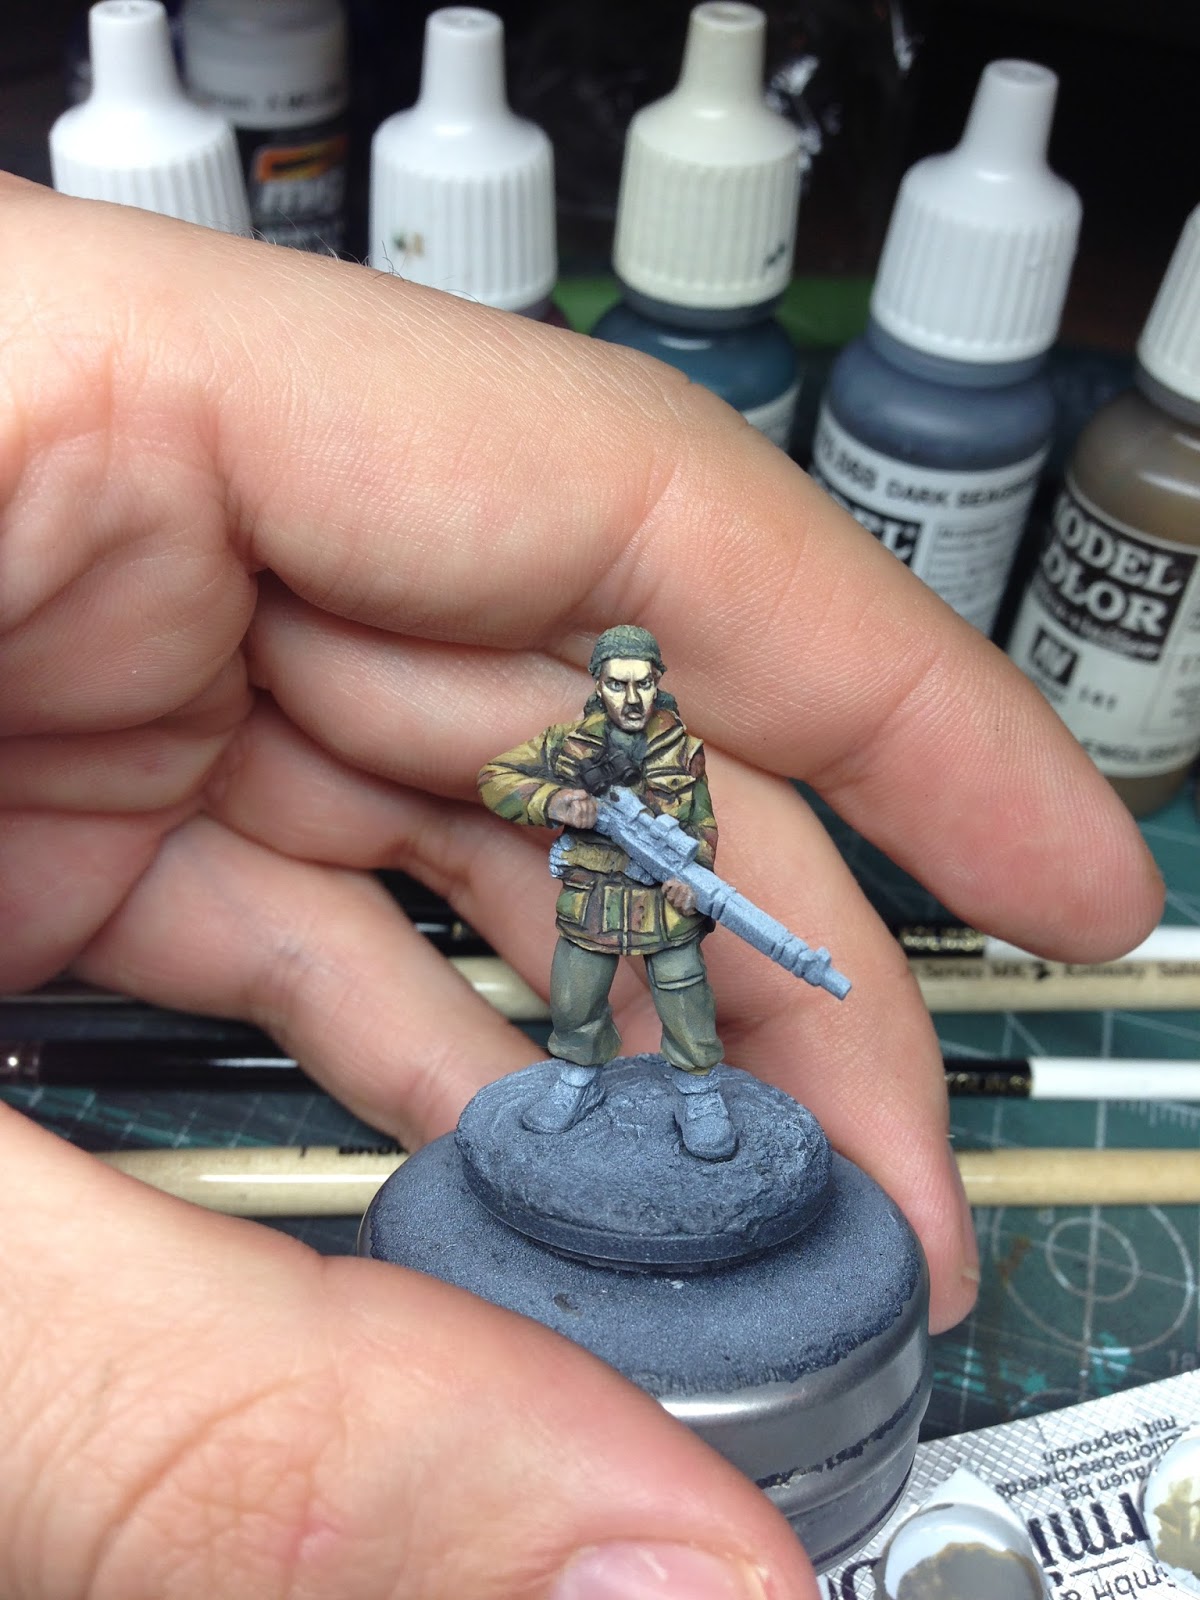
Started this paintjob during a painting jam with a few friends in my basement. So yes, shame on me that there are no pictures before this one here... :(
For the uniform and the trousers, I started with a base of of Green Brown (MC879) and Green Ochre (MC914).
For the face, I used colors like Mahagony Brown (MC846), Dark Sand (MC847), any red, any blue any yellow, black and white. At this point of the process I was actually not fully happy with it yet. I liked the lights and shadows (mostly), but I thought it still looked a bit boring. So you will see more progress on the face later on.
For the pirate cloth (I am sure there is a better term for it), I used Brone Green (MC897), Dark Sea Green (MC868) and Green Brown (MC914).
If you take a look at the pants, you can see that I also started playing around with some wet-blending technique that Meg Maples demonstrated at a workshop in Holland. It is something I am still trying to master... scroll down a bit and I'll try to explain how it works.


Now let me try to explain the wet-blending technique (which I am still learning and practicing...):
First of all, I don't use a wet palette as the paint needs a lot less dilution that what I am normally used to. Let's assume you want to paint shadows and you want to wet-blend them.
* Start by mixing a shadow color. In my case that was the base color (green brown) with a dark blue. * Now use one brush to place a bit of color where you want the shadow to be (a fold or at an edge). * Quickly switch to another, clean brush which you have licked moist, paint with your saliva/water mix the area that you want the shadow color to blend into so that there is a thin layer of that mix right around the color that you have placed.
* Now use that same brush to "push" the shadow color deeper into the fold and after that start to "pull" it out again and over the area which you have moistened with your saliva/water mix.
Most of the color will stay in the fold, but some of it you will pull out and thus create a transition between the deepest part of the fold and the area with the base color.
I hope I am making some sense here. By the way, this can also be done with just one brush, but that means that you have to be fairly quick between placing the color, washing out your brush and now using the brush for the "push" and "pull" that I tried to describe.

Here is a shot of what my palette looked like after painting the jacket with the camouflage, the trousers (which I pushed a lot more in a greenish direction with Dark Sea Green (MC868) and the pirate cloth.

Colors used so far

For painting the camo, I used exactly the same color recipe as I did with Roy. The only difference was the way how I painted the colors on. I didn't do it with very thinned paints this time, but I just slapped paint on that was only very little thinned. It is quite interesting how different it looks compared to Roy even though I used exactly the same colors.


Next, I took care of the face. All I did to make it look more interesting was the following
* Painted a dark vertical frontal lobe to simulate a frown. This made him look a lot more bad ass
* Used very thinned red to glaze his cheeks and the mid-section of his face
* Used very thinned yellow to glaze his forehead
* Used very thinned green to glaze the lower part of his face (chin, etc.)
Voilá!

For the parts directly above his boots, I used a bse of Grey Green (MC886), added lights with Dark Sand (MC847) and Iraqui Sand (MC819). Shadows with English Uniform (MC921).

For the rifle, I used a flat brown (MC981) mixed with mahagony brown (MC846). Added Orange Brown (MC981) and Black to the mix to paint the wood grain.

Finished up the pirate cloth on his head by going back and forth between Dark Sea Green, Bronze Green and Green Brown.

Update from the wet palette.

For the belt, I used a base of Green Grey, which I washed with English Uniform and Flat Brown and highlighted with Iraqui Sand and Dark Sand.

Finally painted a rough NMM using Black, White and Blue Ink.

For the base, I basically slapped all colors from my palette on it and blended them while still wet.
One dry-brush with MC Dark Sand and I was ready to glue on some static grass and other stuff like old tyhme, oregano and a few flowers from MiniNatur. Once the wood glue was dry, I lightly washed everything with very thinned down yellow ink + green color.
Done:
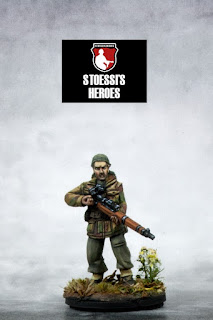


If you are interested in getting your own copy of Harold, hop over to Stoessi's Heroes Store or check out one of our resellers.
Cheers!